

# Client Notifications For WHMCS
# (opens new window) About Client Notifications For WHMCS (opens new window)
Client Notifications For WHMCS lets you display targeted alerts, popups and bell notifications directly in the WHMCS client area.
Create a message once, add its content in every language your clients use, decide who should see it and when, and the module will display it to the right clients.
The module can also create notifications on its own when an invoice is created, a service is suspended or terminated, or a service or domain is about to reach its due date.
Core Features
- Display Targeted Messages In WHMCS Client Area
- Create Three Types Of Client Messages:
- Alerts
- Popups
- Notifications
- Target Messages Based On Clients, Services And Domains
- Schedule Messages For Selected Time Periods
- Define Popup Display Frequency Per Client
- Prepare Message Content In Multiple Languages
- Automatically Create Notifications For Selected WHMCS Events
- Track Message Views And Activity
Addon Module
- View Dashboard With Message Summary:
- View Scheduled, Active And Expired Alerts
- View Scheduled, Active And Expired Notifications
- View Scheduled, Active And Expired Popups
- View Message Statistics:
- View Alert, Notification And Popup Views From The Last 24 Hours
- View Alert, Notification And Popup Views From The Last 7 Days
- View All-Time Alert, Notification And Popup Views
- View Message Activity From The Last 30 Days On Graph
- Create And Manage Client Messages:
- Enable Or Disable Message
- Specify Message Name
- Select Message Type
- Select Display Style
- Set Start And End Date
- Configure Popup Messages:
- Select Popup Style
- Select Popup Size
- Define Display Frequency For The Same Client
- Configure Notification Messages:
- Select Notification Style
- Select Notification Icon
- Define Target Link
- Define Message Display Rules Based On:
- Clients
- Client Groups
- Products
- Product Groups
- Addons
- Domain TLDs
- Combine Display Rules Using AND / OR Logic
- Create Multilingual Message Content:
- Select Default Language
- Define Subject And Body Per Language
- Configure General Settings:
- Show Or Hide Notification Bell In Client Area
- Include Native WHMCS Notifications In Notification Center
- Define Popup Display Delay
- Automatically Create Notifications For:
- New Invoices
- Suspended Services
- Terminated Services
- Upcoming Service Due Dates
- Upcoming Domain Due Dates
- Customize Module Language Files With "Translations" Tool
- Control Administrator Access To Module Sections And Actions
- Use Scheduler To Manage Automated Module Tasks
- View Module Logs
- View Dashboard With Message Summary:
Client Area
- View Alerts Directly In Client Area
- View Popup Messages In Client Area
- Access Messages Through Dedicated Notification Center
- View Unread Notification Counter
- Open Target Links Directly From Notifications
- Mark All Notifications As Read
- Dismiss Individual Notifications
- Dismiss All Notifications
General Info
- Multi-Language Support With Custom Translations Tool
- Supports PHP 8.4 Back To PHP 8.2
- Supports WHMCS Themes "Six", "Twenty-One", "Nexus" And "Lagom WHMCS Client Theme"
- Supports WHMCS V9.1 Back To WHMCS V8.10
- Requires ionCube Loader V14 Or Later
- Easy Module Upgrade (opens new window) To Open Source Version (opens new window)
# Installation
This tutorial will show you how to successfully install and configure Client Notifications For WHMCS. (opens new window)
We will guide you step by step through the whole installation and configuration process.
Log in to our client area and download the module.
Extract the package and upload its content into the main WHMCS directory.
The content of the package to upload should look like this.When you install Client Notifications For WHMCS for the first time you have to rename the 'license_RENAME.php' file.
This file is located in 'modules/addons/ClientNotifications/license_RENAME.php'. Rename it from 'license_RENAME.php' to 'license.php'.In order to configure your license key, you have to edit the previously renamed 'license.php' file.
Enter your license key between quotation marks as presented on the following screen. You can find your license key in our client area → 'My Products'.
Now you have to activate the module in your WHMCS system.
Log in to your WHMCS admin area. Go to 'System Settings' → 'Addon Modules'. Afterward, find 'Client Notifications' and press the 'Activate' button.
In the next step you need to permit access to this module.
To do so, click on the 'Configure' button, check required group of administrators and press 'Save Changes'.Set up the module cron job.
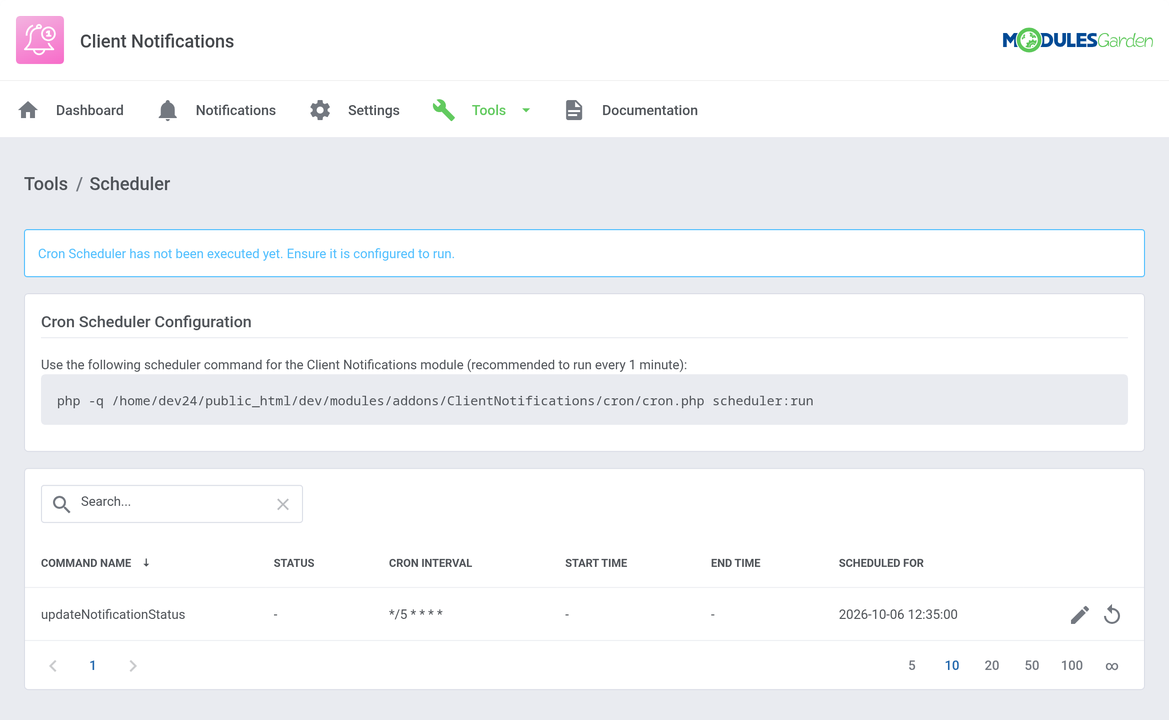
The module has its own scheduler which refreshes the notification status (Pending, Active, Expired) every 5 minutes.
Add the below command to your server cron. It is recommended to run it every 1 minute. Replace 'your_whmcs' with the real path to your WHMCS installation.
* * * * * php -q /your_whmcs/modules/addons/ClientNotifications/cron/cron.php scheduler:run
You can find the exact command for your installation under 'Tools' → 'Scheduler' in the module.
The automatic notifications for services and domains close to their due date are created by the standard WHMCS daily cron job, so make sure the WHMCS system cron is also running.
- You have just successfully installed Client Notifications For WHMCS!
You can access your module under 'Addons' → 'Client Notifications'.
# Configuration and Management
Client Notifications For WHMCS has been created to help you reach your clients with important messages exactly where they look for them, in the client area.
Create alerts, bell notifications and popups, target them with rules and let the module inform your clients automatically about invoices, suspensions and upcoming due dates.
# Notifications
In order to configure your module properly, proceed to 'Addons' → 'Client Notifications' → 'Notifications'.
Here you will find the list of all notifications. The list contains:
- Search - find a notification by its name.
- ID - the identifier of the notification.
- Name - the name of the notification, visible only in the admin area.
- Enabled - turn a notification on or off at any time without deleting it.
- Status - the current state of the notification: Pending, Active or Expired.
- Type - Alert, Notification or Popup.
- Starts At and Ends At - the period in which the notification is displayed.
- Created By and Updated By - the administrators who created and last changed the notification.
- Created At and Updated At - the date and time of these changes.
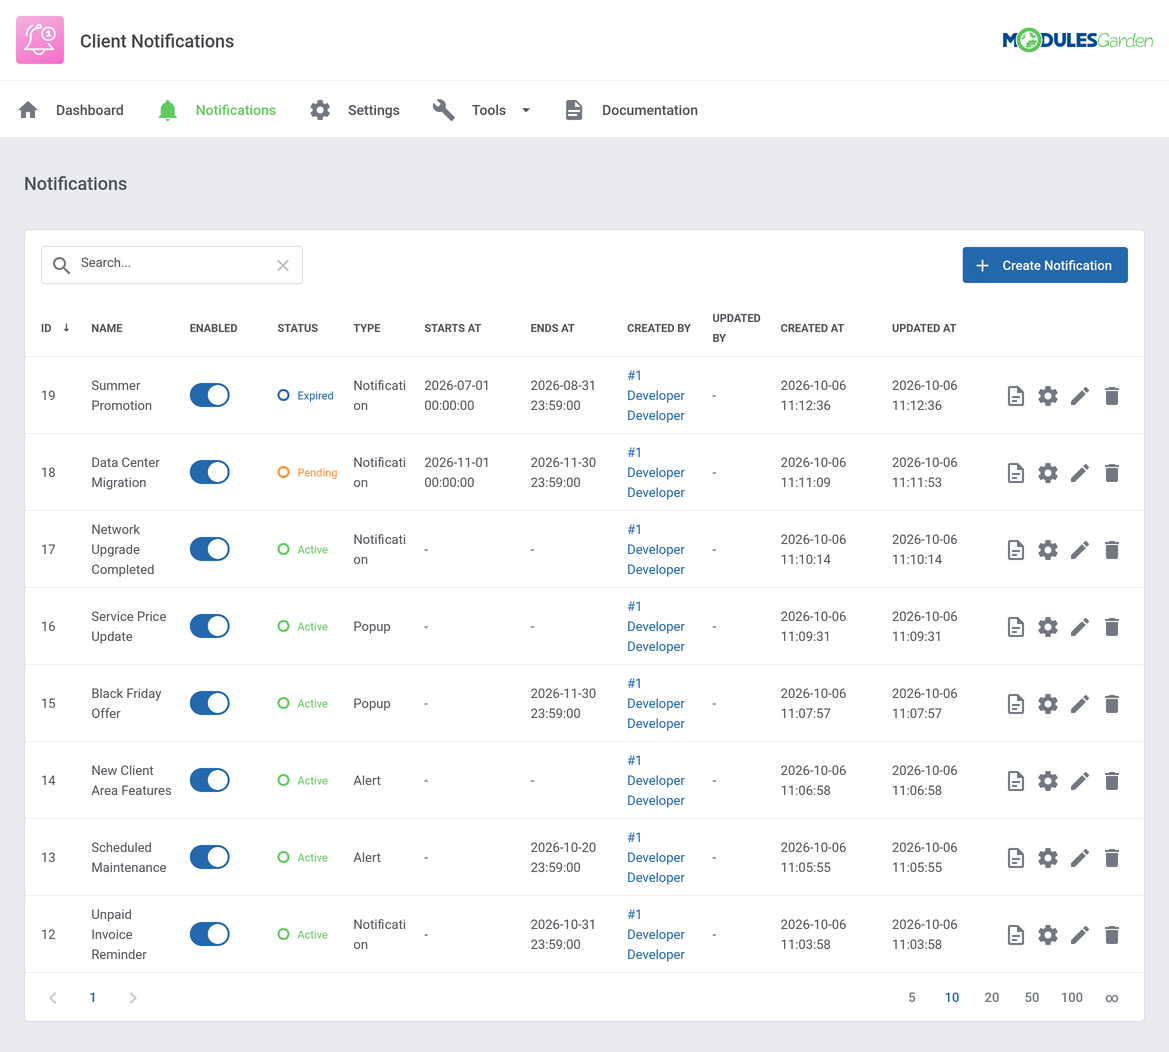
A notification can have one of the following statuses:
- Pending - the start date is in the future, the notification is not displayed yet.
- Active - the notification is currently displayed to clients who match its rules.
- Expired - the end date has passed, the notification is no longer displayed.
The status is refreshed by the module scheduler every 5 minutes.
Each row of the list has four action buttons:
- Manage Content - define the subject and body in one or more languages.
- Manage Rules - choose which clients will see the notification.
- Edit - change the notification type, style, dates and other settings.
- Delete - remove the notification.
# Create Notification
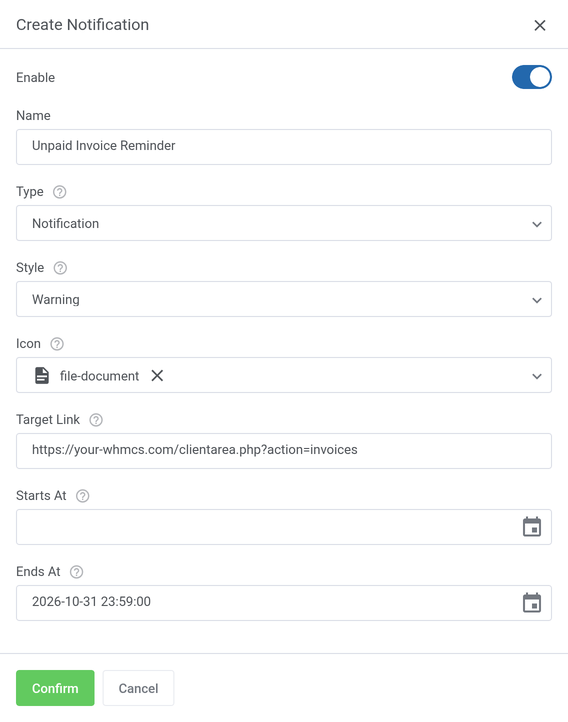
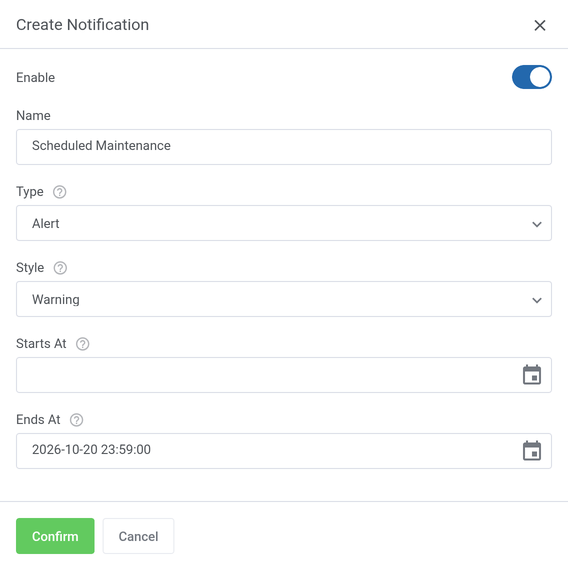
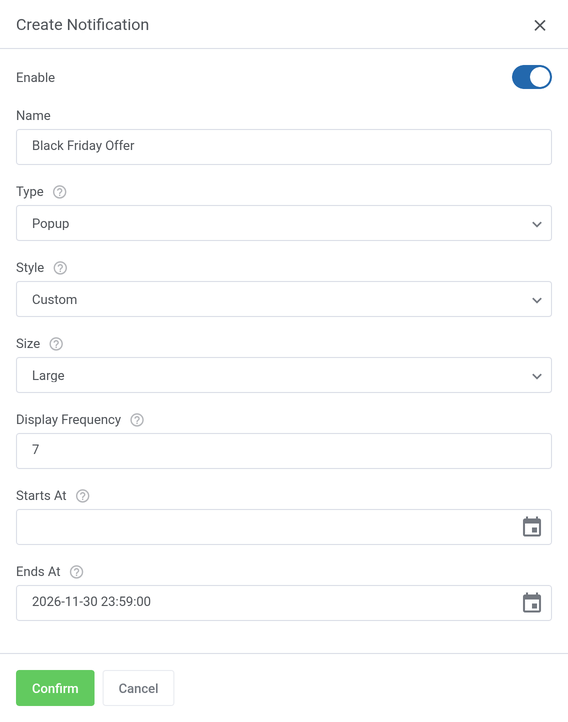
To add a new notification, press the 'Create Notification' button and fill in the form:
- Enable - turn the notification on right away or keep it disabled until you finish its content.
- Name - a unique name, visible only in the admin area.
- Type - choose how the notification will be displayed. Once you pick a type, the fields for that type appear:
- Notification - an entry in the bell dropdown in the client area menu.
- Alert - a colored bar at the top of the client area page.
- Popup - a modal window displayed after the page loads.
- Style - the color and icon of the notification: Info, Success, Warning or Danger. Popups have one more style, Custom, which lets you enter your own HTML content in an editor instead of a subject and a plain text body.
- Icon - Notification type only. An optional icon displayed next to the notification in the bell dropdown. Use the search field to find an icon by its name.
- Target Link - Notification type only. An optional address the client is taken to after clicking the notification. The link must start with http:// or https://. Leave it empty to keep the notification non-clickable.
- Size - Popup type only. The size of the popup window: Default, Small, Large, Extra Large, Ultra Large or Full Page.
- Display Frequency - Popup type only. The number of days after which the same popup is displayed to a client again. Leave it empty or enter 0 to display the popup only once.
- Starts At - the date and time from which the notification will be active. Leave it empty to make it active right away.
- Ends At - the date and time when the notification will expire. Leave it empty if the notification should never expire. The start date must be before the end date.
Press 'Confirm'. You will be redirected to the 'Content' page of the new notification.
The form for the 'Notification' type:
The form for the 'Alert' type:
The form for the 'Popup' type:
# Content
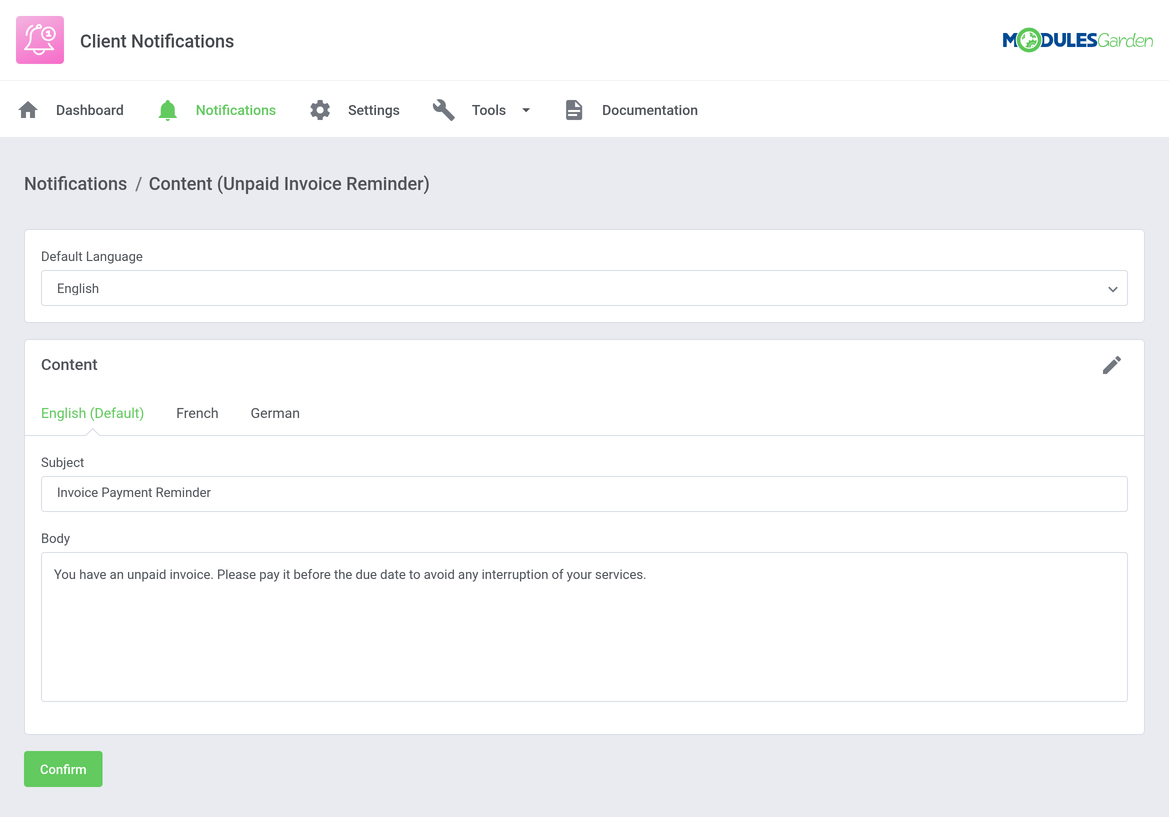
On the 'Content' page you define what the clients will see:
- Default Language - the language whose content is used for clients whose own language has no content.
- Language tabs - one tab for each content language. The default language is marked as '(Default)'.
- Subject - the title of the notification in the selected language.
- Body - the text of the notification in the selected language.
Press 'Confirm' to save the content.
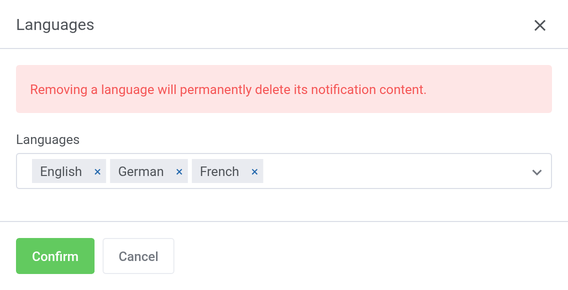
To add more languages, press the pencil icon in the 'Content' widget. The 'Languages' window contains:
- Languages - pick the languages you want to write the content in.
Important: Removing a language from this list deletes its content. The default language cannot be removed.
A client always sees the content in their own WHMCS language. If there is no content in that language, the default language is used.
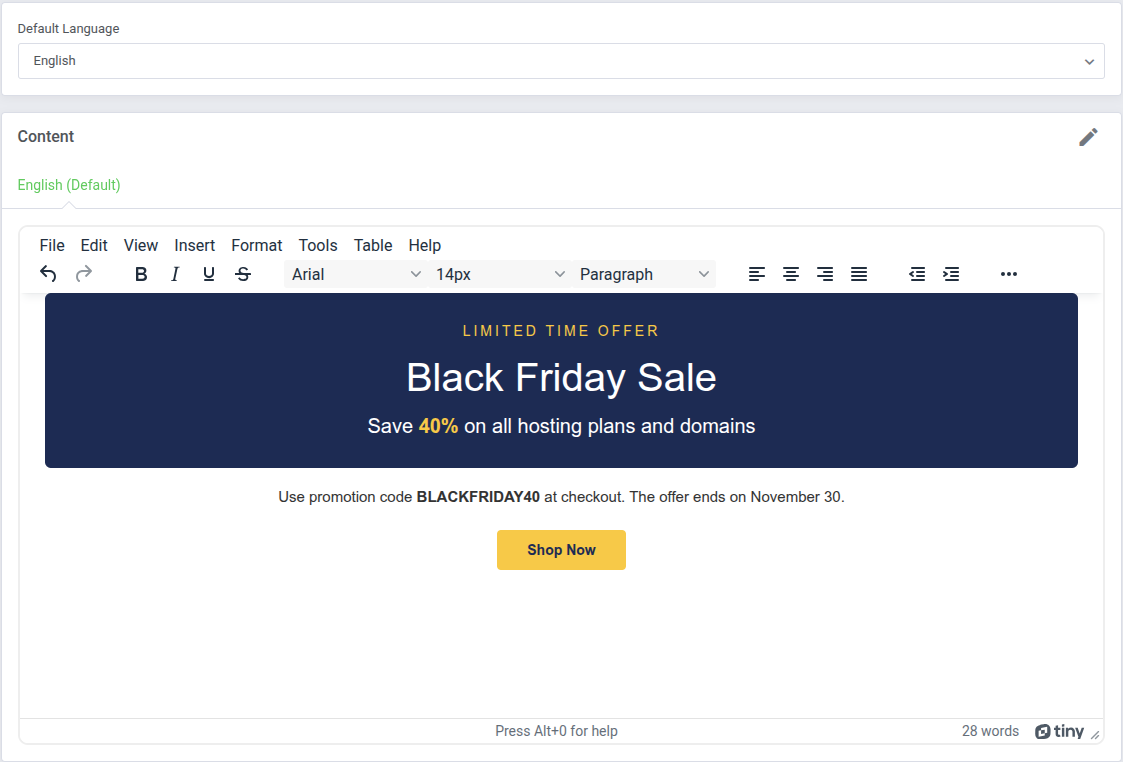
For a popup with the 'Custom' style, the 'Content' page contains:
- HTML editor - build your own layout with headings, images, links or buttons. It replaces the 'Subject' and 'Body' fields.
Important: When creating a popup with the 'Custom' style, switch the HTML editor to 'View' → 'Source code' before adding or editing your HTML code. Using the standard visual editor may modify the HTML structure and cause the popup to display incorrectly.
# Rules
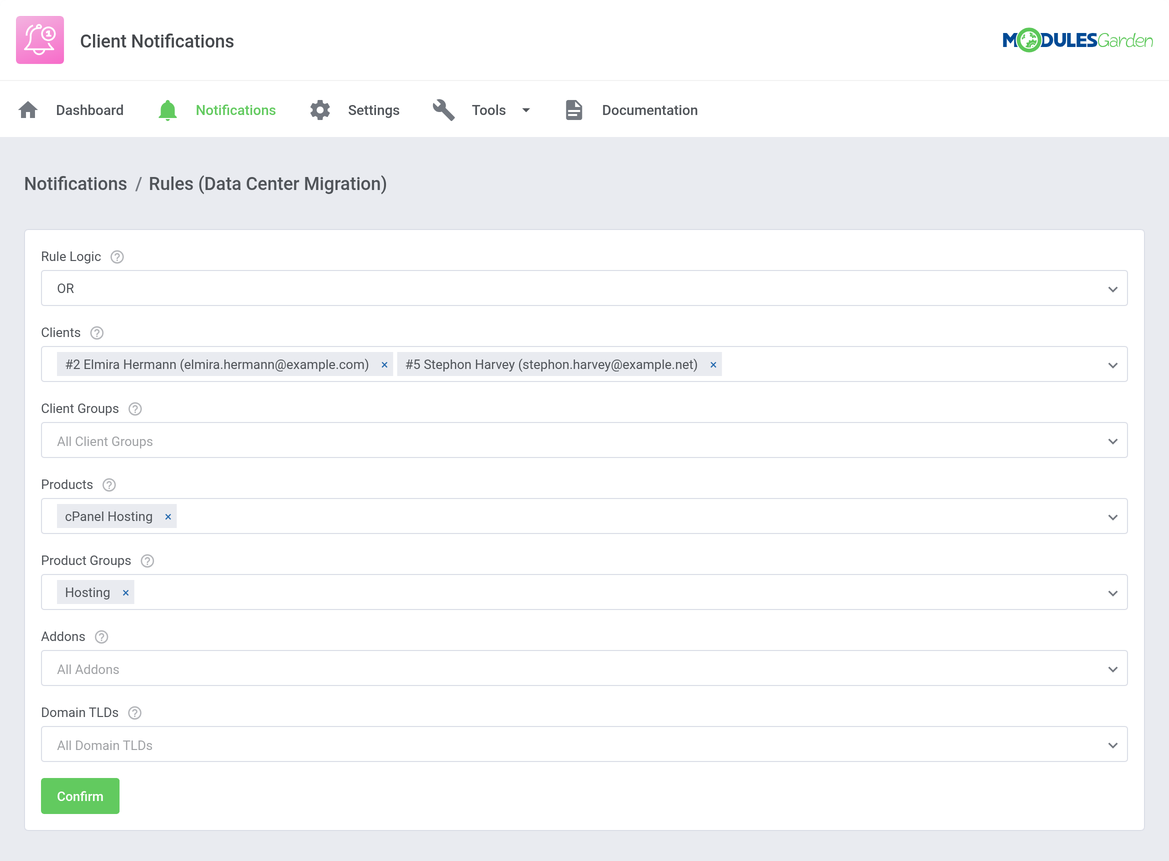
On the 'Rules' page you decide who will see the notification. Leave all fields empty to display it to all clients. The page contains:
- Rule Logic - how the rules are combined:
- AND - the client must match every rule you set.
- OR - the client must match at least one of the rules.
- Clients - only the selected clients.
- Client Groups - clients that belong to the selected groups.
- Products - clients with an active or suspended service of the selected products.
- Product Groups - clients with an active or suspended service from the selected product groups.
- Addons - clients with an active or suspended addon of the selected type.
- Domain TLDs - clients with a domain ending with one of the selected TLDs.
Press 'Confirm' to save the rules.
# Settings
# General Settings
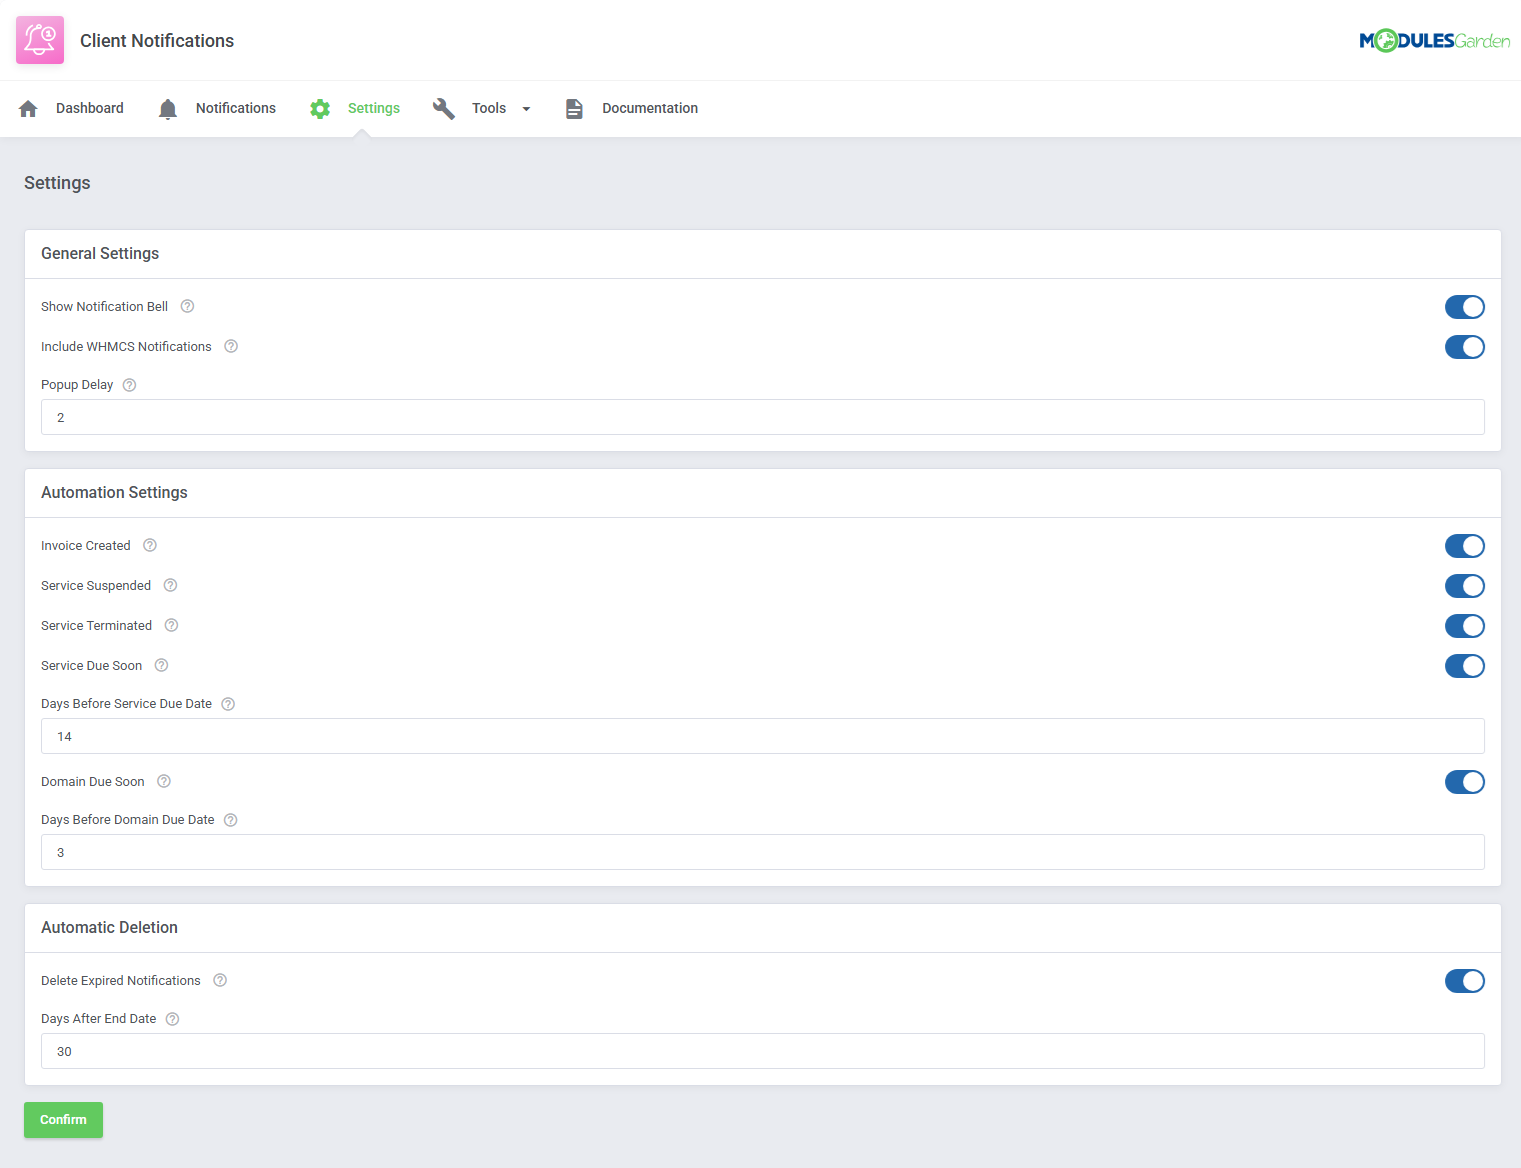
Under the 'Settings' tab you must define a few useful options.
- Show Notification Bell - show or hide the module notification bell in the client area. This setting does not affect alerts or popups. When it is switched off, the options below are disabled and no automatic notifications are created.
- Include WHMCS Notifications - when enabled, the standard WHMCS notifications are listed inside the module bell dropdown and the WHMCS notification icon is hidden.
- Popup Delay - the number of seconds to wait after the page loads before a popup is displayed. Enter 0 to display popups right away.
# Automation Settings
These options let the module create bell notifications automatically. Each automatic notification is of the 'Notification' type, targeted at the one client it concerns and active for 30 days from the moment it is created.
Its subject and body come from the module language file, so you can adjust the wording with the 'Translations' tool.
- Invoice Created - a notification is created when a new invoice is published for the client. Its link leads to the invoice.
- Service Suspended - a notification is created when a service is suspended. Its link leads to the service details page.
- Service Terminated - a notification is created when a service is terminated. Its link leads to the service details page.
- Service Due Soon - a notification is created when the next due date of an active service is close. Its link leads to the service details page.
- Days Before Service Due Date - visible when 'Service Due Soon' is enabled. The number of days before the service due date when the notification is created.
- Domain Due Soon - a notification is created when the next due date of an active domain is close. Domains marked as 'Do Not Renew' are skipped. Its link leads to the domain details page.
- Days Before Domain Due Date - visible when 'Domain Due Soon' is enabled. The number of days before the domain due date when the notification is created.
Note: The 'Service Due Soon' and 'Domain Due Soon' checks run once a day with the WHMCS daily cron job. Each service or domain receives only one notification for a given due date.
Press 'Confirm' to save the settings.
# Tools
Translations
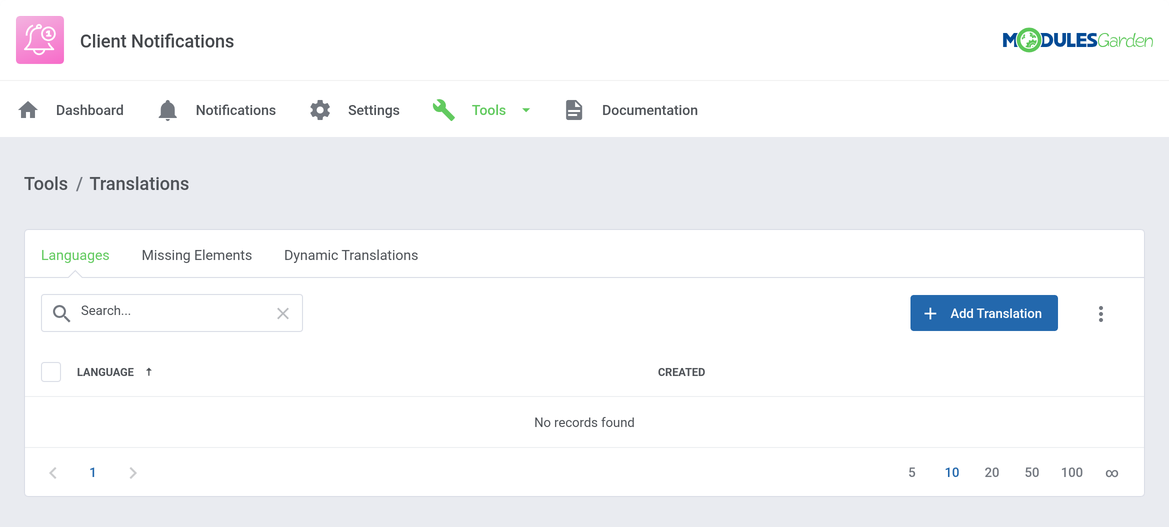
Customizing language files is now extremely easy with the "Translations" tool that is now available directly in the addon.
Its user-friendly design makes managing various language file tweaks a smooth and efficient process.
Prepare translations for the original English files with this handy built-in tool. For specific instructions on how to use this tool please refer to its dedicated article, you will find it here.
Access Control
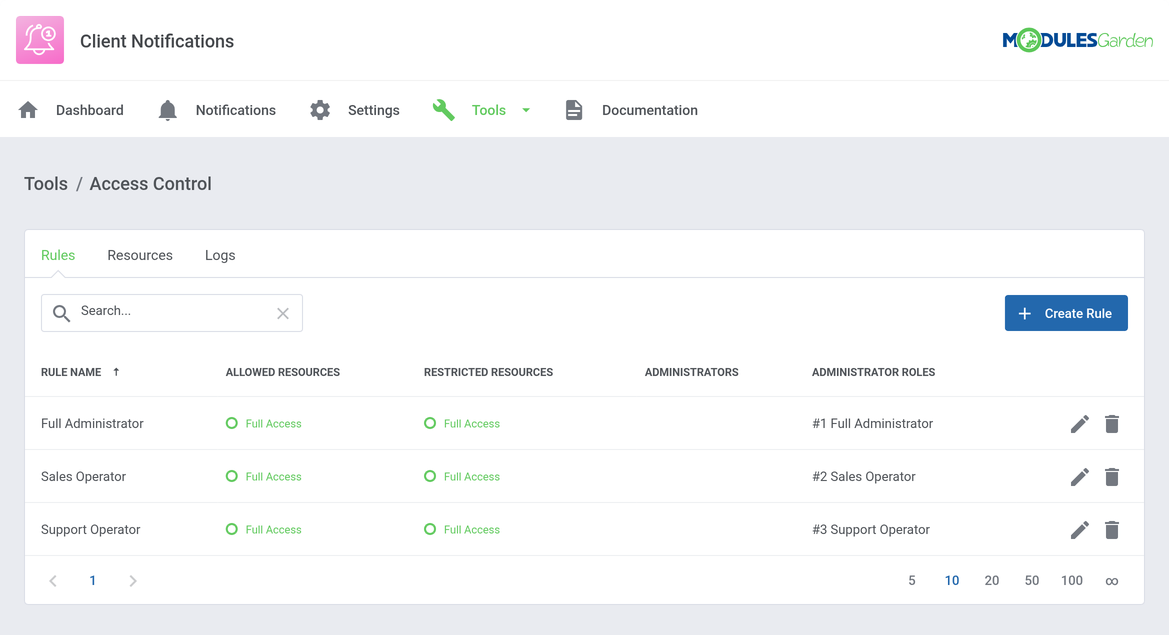
The 'Access Control' tool allows you to manage and restrict admin access to specific sections and features within the module.
You can create rules to grant or deny access to resources, ensuring each team member has appropriate permissions.
It also tracks admin activity through detailed logs, offering clear accountability. This tool is available in several WHMCS addons.
For detailed instructions, refer to the dedicated article here.
# Scheduler
The 'Scheduler' tool lets you verify that the module cron job described in the 'Installation' section is set up correctly. The page contains:
- Status message - the time of the last scheduler run. Until the cron runs for the first time, a warning is displayed that the scheduler has not been executed yet.
- Cron Scheduler Configuration - the cron command prepared for your installation.
- Command list - the module scheduler commands with their name, status, cron interval, start time, end time and the time of the next run.
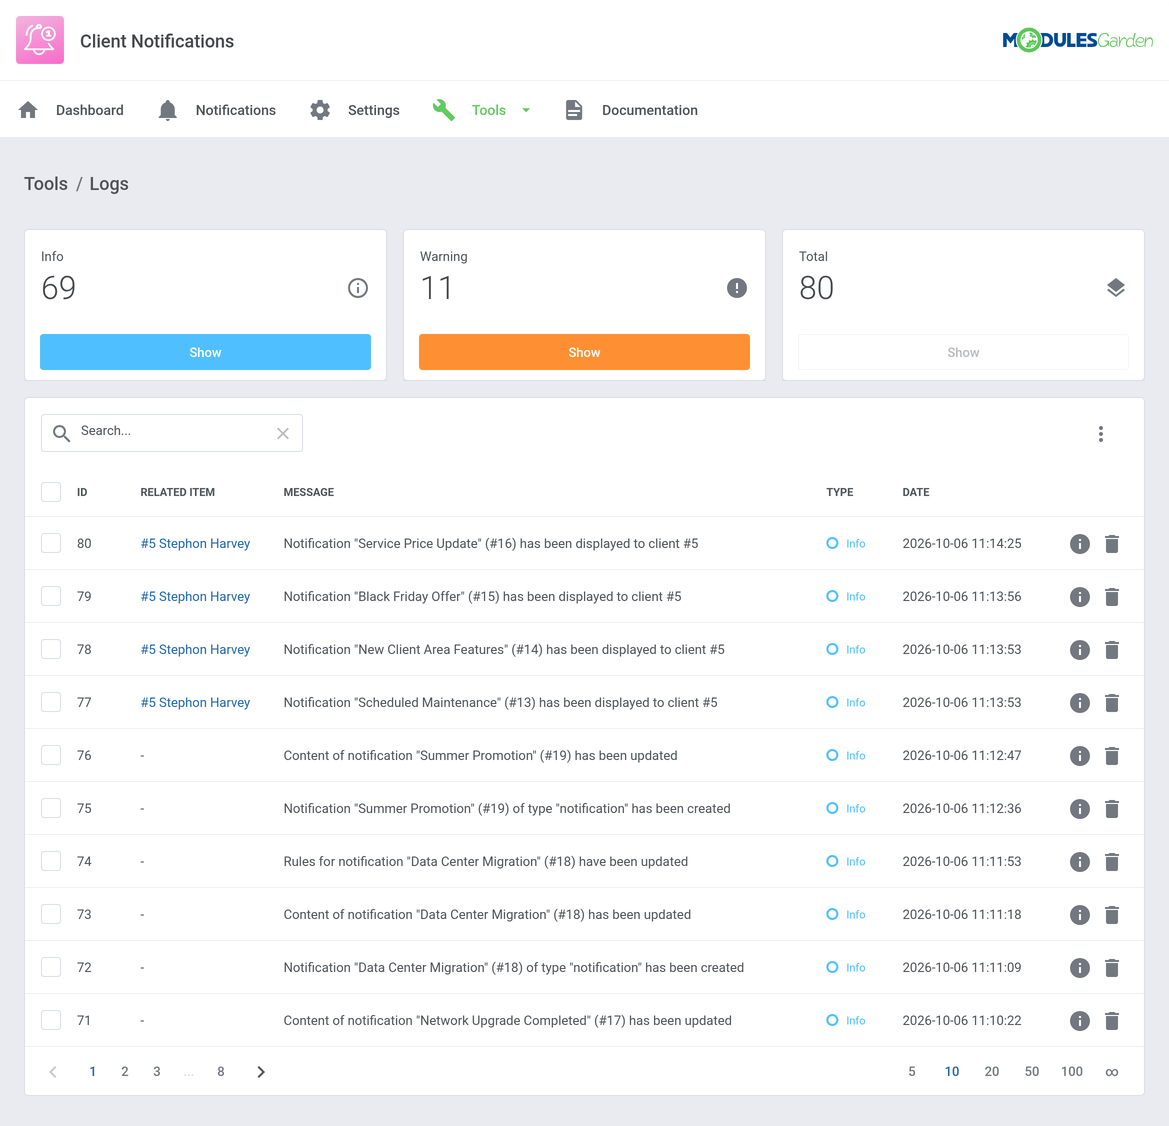
Logs
The 'Logs' tool provides a structured way to track and manage module activity.
It allows filtering logs by type, viewing detailed records, exporting data, and configuring automatic deletion rules. A bulk delete option is also available for easier management.
In Client Notifications For WHMCS the logs record events such as a notification being created, enabled, disabled or updated, its content, languages or rules changed, and a notification displayed, read or dismissed by a client.
For detailed instructions on using this tool, refer to its dedicated article here.
# Dashboard
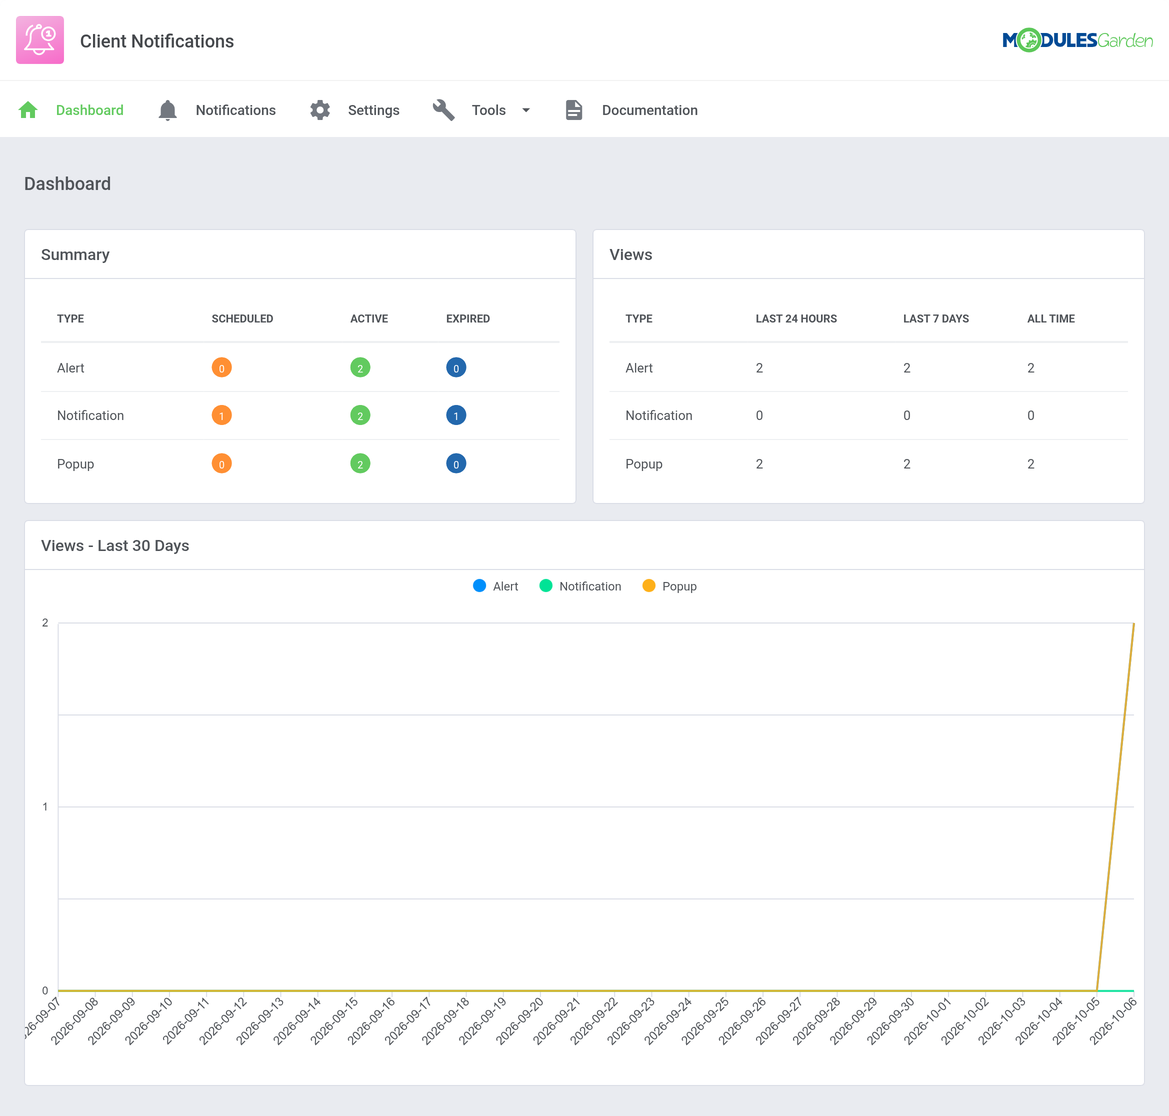
The Dashboard offers a quick overview of your Client Notifications module status. It contains:
- Summary - the number of scheduled, active and expired notifications per type.
- Views - the number of views per type in the last 24 hours, last 7 days and all time.
- Views - Last 30 Days - a graph of views per type for the last 30 days.
# Documentation
The very last tab 'Documentation' once clicked will redirect you to the article you are currently reading!
# Client Area Experience
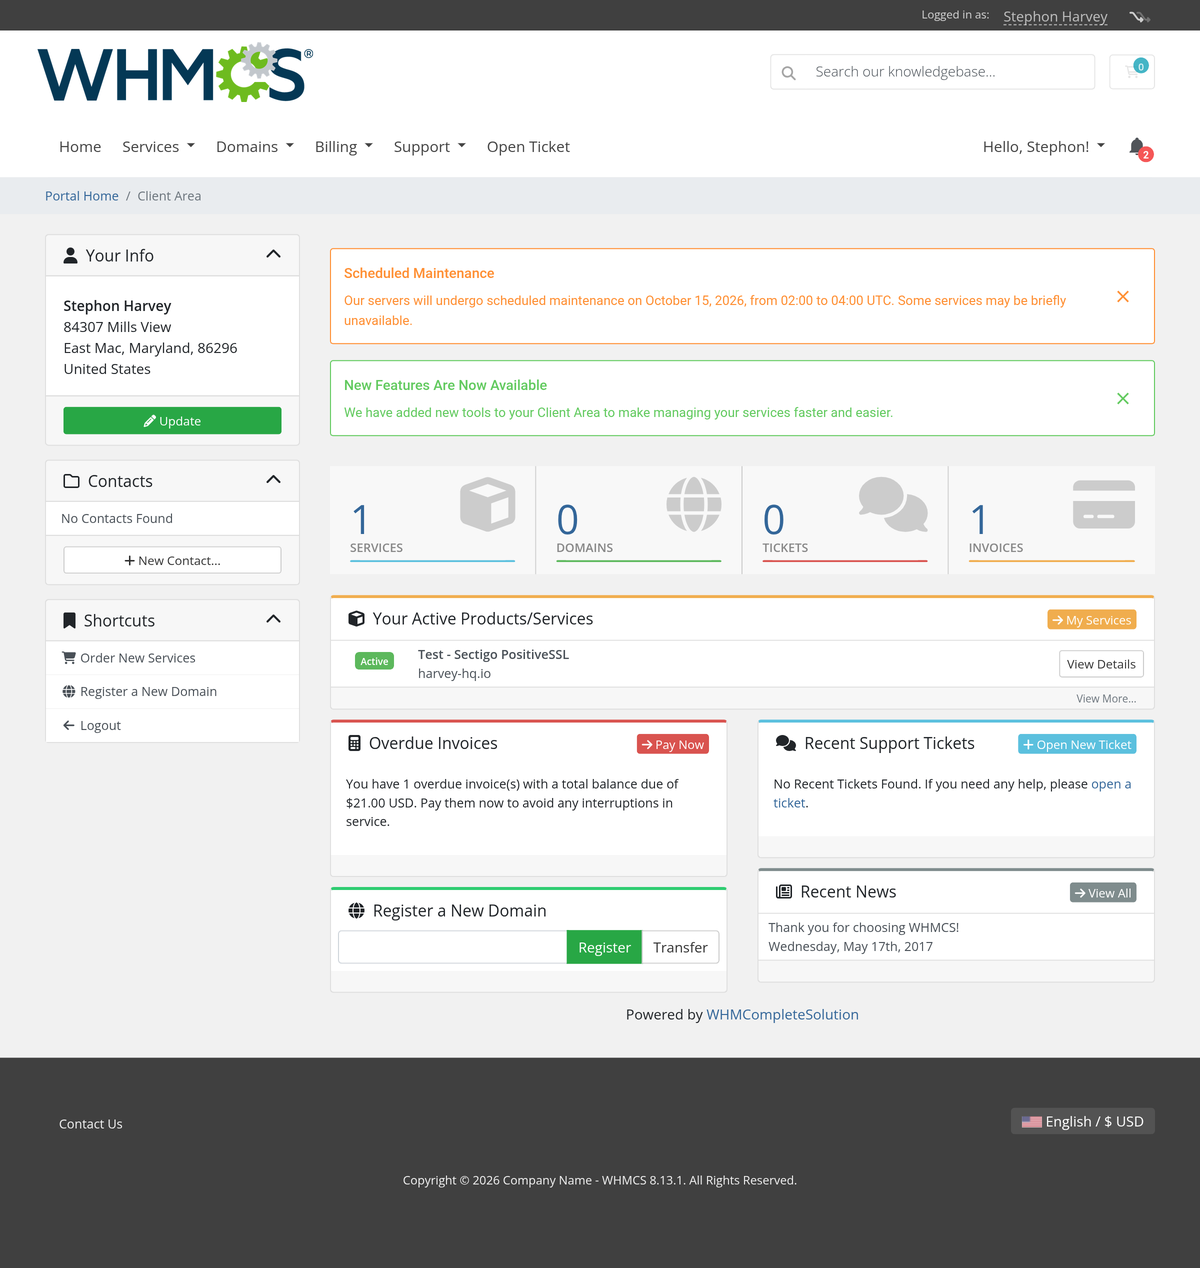
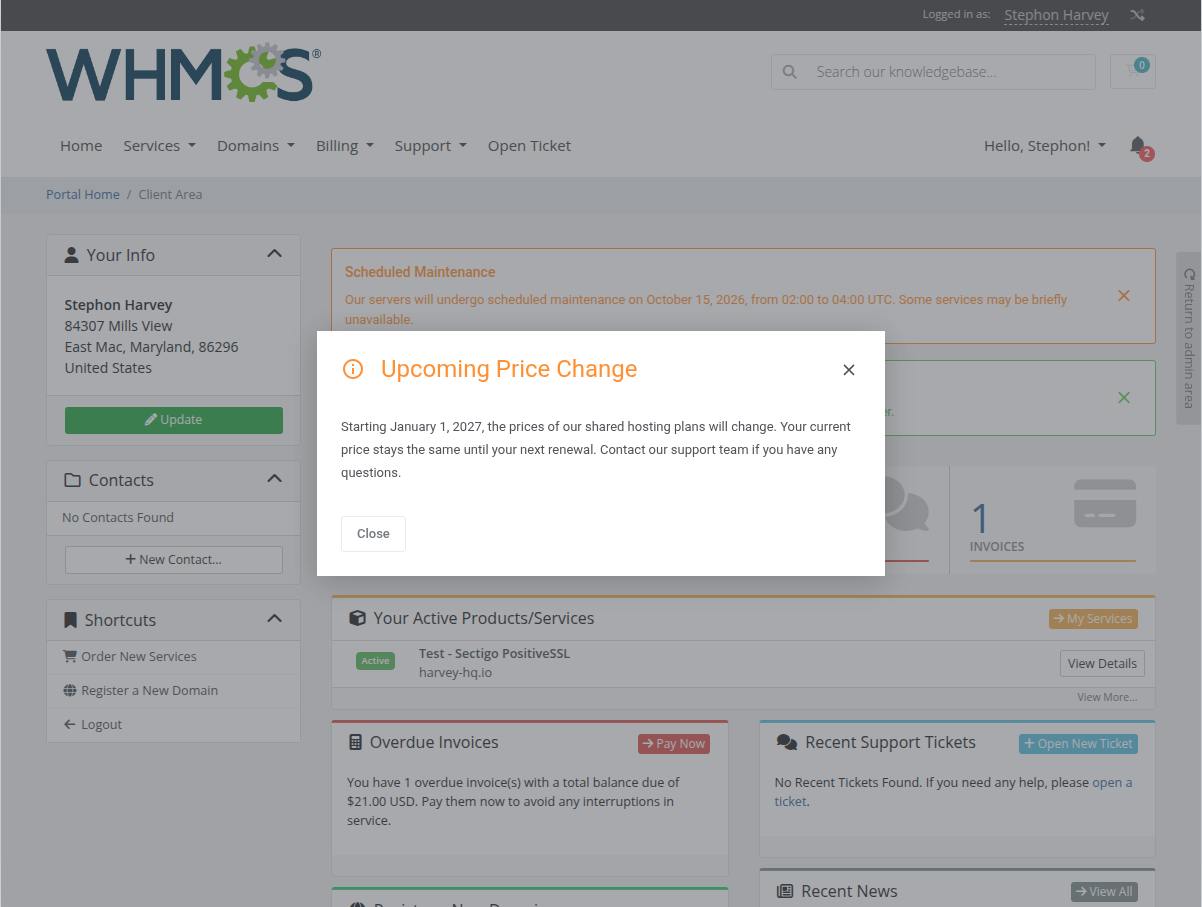
Client Notifications integrates smoothly into the WHMCS client area. Notifications are displayed to logged in clients only and the module supports the 'Six', 'Twenty-One', 'Nexus' and 'Lagom2' themes.
Alerts are displayed at the top of the main content on every page:
- Colored bar - the color depends on the chosen style.
- Close button - the client can close the alert with the 'x' button. A closed alert is not displayed again.
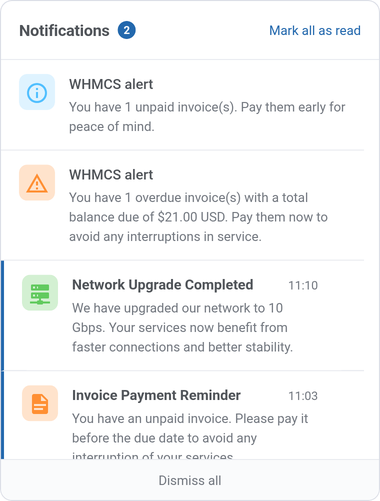
Notifications are listed in the bell dropdown in the top menu:
- Bell icon - shows the number of unread notifications and refreshes itself every 15 seconds.
- Notification - click it to mark it as read and open its target link, if one is set.
- Delete icon - dismiss a single notification.
- Mark all as read - mark all notifications as read.
- Dismiss all - remove all notifications from the list.
- WHMCS notifications - if the 'Include WHMCS Notifications' option is enabled, the standard WHMCS notifications are displayed in the same list.
Popups open as a modal window after the page loads:
- Delay - the popup opens after the number of seconds set in 'Popup Delay' in the module settings.
- Close button - the client closes the popup with its button.
- Repeating - a popup is displayed to a client once, or again after the number of days set in its 'Display Frequency'.
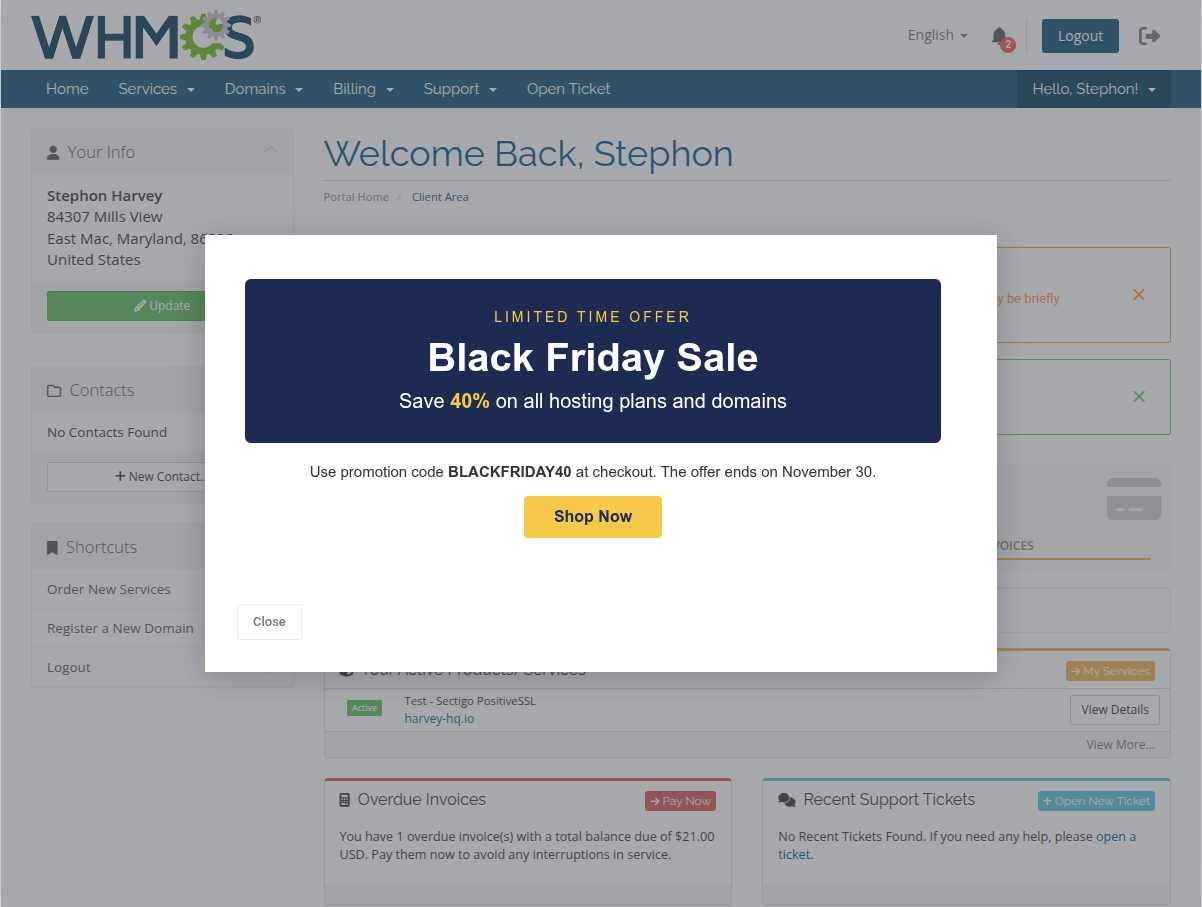
A popup with the 'Custom' style displays your own HTML content:
# Tips
The module displays notifications only to logged in clients. Guests and users who are not linked to a client account do not see them.
A notification with no content in a given language falls back to the default language. Set the default language to the one most of your clients use.
If you want a notification to be visible right away and never expire, leave both 'Starts At' and 'Ends At' empty.
Use 'Display Frequency' to repeat a popup, for example enter 7 to remind clients about an offer once a week.
Bell notifications stay in the list until the client dismisses them or until the notification expires.The 'Custom' popup style lets you add your own HTML with images, links or buttons. Use 'View' → 'Source code' in the HTML editor when entering custom HTML to ensure it is displayed correctly.
To change the subject and body of the automatic notifications, go to 'Tools' → 'Translations' and edit the 'automations' entries of the language file.
# Update Instructions
Essential guidance through the process of updating the module is offered here.
Ensure successful completion of the module update by carefully following each step, thereby preventing data loss or any unforeseen issues.
# Upgrade Guide
Seeking a solution that offers greater flexibility, customization tailored to your precise needs, and unrestricted availability?
There is an option that not only proves to be cost-effective in the long run but also includes prioritized support services, making it a truly valuable investment.
Opt for the Open Source version (opens new window) of your Client Notifications For WHMCS module to unlock these benefits.
Simply click on either the Get Source Code or Upgrade To Lifetime button found on the product's page in our client area to complete the one-step upgrade process, with a dedicated discount already applied.
Follow a comprehensive guide covering the transition process, the advantages it brings, and step-by-step instructions on what to do next after the order has been successfully finalized.
# Common Problems
When you have problems with connection, check whether your SELinux or firewall does not block ports.
Notifications are not displayed in the client area. Check the following:
- The client area uses the 'Six', 'Twenty-One', 'Nexus' or 'Lagom2' theme.
- The notification is enabled and its status is 'Active'. Verify the 'Starts At' and 'Ends At' dates.
- The notification has content in the default language. A notification without content is not displayed.
- The client matches the rules set on the 'Rules' page. With the 'AND' logic the client must match all of them.
- The client is logged in. Notifications are not displayed to guests.
- For bell notifications, 'Show Notification Bell' is switched on in the module 'Settings'.
The notification status stays 'Pending' or 'Active' after its date has passed. The module scheduler is not running. Add the cron command from 'Tools' → 'Scheduler' to your server as described in the 'Installation' section.
Automatic 'Service Due Soon' or 'Domain Due Soon' notifications are not created. They are created by the WHMCS daily cron job. Make sure the WHMCS system cron runs every day and the options are enabled in 'Settings'. Only active services and domains with a due date inside the defined number of days are taken into account.
A popup is displayed only once. This is the expected behavior when 'Display Frequency' is empty or set to 0. Enter the number of days after which the popup should be displayed again.
The WHMCS notification icon is still visible next to the module bell. Enable 'Include WHMCS Notifications' in the module settings to hide the WHMCS icon and display its notifications in the module dropdown.